
How To Design A Waterproof Mosquito Light
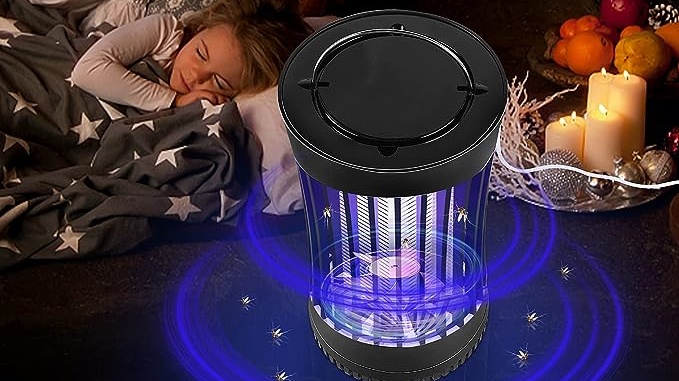
There’s something almost magical about a mosquito light—a beacon in the night that promises to shield us from the irksome buzz and bites of mosquitoes.
The moment you notice your mosquito light acting more like a beacon for moths than a nemesis for mosquitoes, it’s a clear signal: a bulb change is in order.
Embarking on this task might seem daunting, but fear not, for this guide is here to turn this seemingly mundane chore into an adventure.
By following a few simple steps, you can ensure that your mosquito light is back in action, keeping those pesky bugs at bay and your evenings serene.
Embarking on the journey of replacing a mosquito light bulb, the paramount concern is safety.
This mission, should you choose to accept it, involves dealing with electricity, a force that, while immensely useful, requires a healthy respect to avoid any unintended hair-raising experiences.
Venturing into the electrifying world of mosquito light maintenance, the very first step is akin to entering any great adventure: ensuring safe passage.
Disconnecting your device from its power source is not just a good idea; it’s a non-negotiable prerequisite.
Like any worthy endeavor, changing a mosquito light bulb requires the proper attire. This isn’t about fashion; it’s about fortification.
Dressing the part means equipping yourself against the twin threats of sharp edges and electrical components.
In the realm of mosquito light bulbs changing, knowledge is power. Entering the fray without knowing the specifics of your bulb is like setting sail without a compass.
With preparations complete and safety measures in place, the stage is set for the main event: the bulb replacement. This process, while straightforward, is a delicate dance of precision and care.

The mosquito light, much like a modern-day treasure chest, requires careful opening. This isn’t about brute force; it’s a test of finesse and understanding of the device’s unique construction.
With the outer shell of the mosquito light open, the quest reaches a critical juncture: removing the old bulb. This step, while simple, is laden with potential pitfalls.
The arrival of the new bulb marks a turning point in this saga. Installing it is not just about reversing the removal process; it’s about ushering in a new era of mosquito light efficiency.
With the new bulb in place, the moment of truth arrives. This is where your efforts are put to the test, quite literally, as you seek to reignite the mosquito light’s bug-zapping prowess.
The epilogue of this bulb-changing journey involves not just resting on one’s laurels but looking ahead. Proper maintenance and regular care ensure that your mosquito light continues to serve as a steadfast guardian against winged intruders.
Just as a ship requires barnacle removal to sail smoothly, your mosquito light benefits greatly from regular cleaning. This not only maintains its aesthetic appeal but ensures peak operational efficiency.

Vigilance in monitoring the bulb’s lifespan not only prepares you for timely replacements but also guarantees that your mosquito light remains a formidable foe to mosquitoes.
The battle against mosquitoes is fraught with many challenges, not least of which is moisture. Water and electronics are a perilous mix, necessitating cautious placement and handling of your mosquito light.
Changing a mosquito light bulb is a tale of preparation, precision, and proactive maintenance.
By following the steps outlined in this guide, you can ensure that your mosquito light remains an effective sentinel against the night-time barrage of mosquitoes.
Remember, the key to a peaceful and enjoyable outdoor experience lies in the care and upkeep of your mosquito light. Let this guide be your beacon, lighting the way to many serene, insect-free evenings.
Can I use any type of bulb for my mosquito light, or does it have to be a specific one?
It’s crucial to use the specific type of bulb recommended by your mosquito light’s manufacturer. Using the wrong type can lead to ineffective pest control or even damage the device. Always check the manual or manufacturer’s website for the bulb specifications needed for your model.
How often should I replace my mosquito light bulb to ensure it remains effective?
The frequency of replacement depends on the bulb’s lifespan and how often you use your mosquito light. A good rule of thumb is to check the manufacturer’s guidelines for the bulb’s expected lifespan and monitor the light’s effectiveness. Typically, replacing the bulb once per season or when you notice a significant decrease in light output or bug zapping ability is a good practice.
What should I do if my new mosquito light bulb doesn’t work after installation?
If your new bulb doesn’t work, first ensure it’s properly installed and the device is plugged in correctly. Check for any signs of damage to the bulb or mosquito light itself. If everything seems in order but it still doesn’t work, the bulb may be defective, or there might be an issue with the mosquito light. Try another bulb, and if the problem persists, consult the manufacturer’s customer service for further assistance.
Is there a way to increase the lifespan of my mosquito light bulb?
While the lifespan of a bulb is generally predetermined, you can take steps to potentially extend it. Ensure your mosquito light is placed in a location where it’s not exposed to excessive moisture or severe temperature fluctuations, as these conditions can shorten bulb life. Additionally, cleaning your mosquito light regularly to ensure optimal airflow can also help prolong the bulb’s effectiveness.
Can changing the mosquito light bulb impact the device’s overall effectiveness in repelling mosquitoes?
Yes, regularly replacing the bulb can significantly impact the device’s effectiveness. A fresh bulb ensures that your mosquito light is operating at peak performance, providing optimal light and heat to attract and eliminate mosquitoes. A dim or burnt-out bulb will not attract mosquitoes effectively, reducing the device’s overall efficiency in keeping your space bug-free.

There’s something almost magical about a mosquito light—a beacon in the night that promises to shield us from the irksome buzz and bites of mosquitoes.

Within the first few moments of considering a mosquito light, the idea transforms from a mere concept into a beacon of hope against the nightly
The moment you switch on a mosquito light, you declare war on those pesky insects. But what if I told you that you could turbocharge
Imagine this scenario: as the hues of twilight blend into the evening sky, your mosquito light buzzes to life, standing guard against the night’s swarm

There’s something almost magical about a mosquito light—a beacon in the night that promises to shield us from the irksome buzz and bites of mosquitoes.
Within the first few moments of considering a mosquito light, the idea transforms from a mere concept into a beacon of hope against the nightly

The moment you switch on a mosquito light, you declare war on those pesky insects. But what if I told you that you could turbocharge
Imagine this scenario: as the hues of twilight blend into the evening sky, your mosquito light buzzes to life, standing guard against the night’s swarm